How to Make Perfect Miter Cut Rails for Your next Woodworking Project
In the world of woodworking, achieving flawless miter cuts is essential for creating professional-looking projects. Miter cut rails are a fundamental component that can elevate the aesthetic and structural integrity of any woodworking endeavor. Renowned woodworking expert Michael O'Brien once stated, “The secret to exceptional craftsmanship lies in the precision of your cuts.” This philosophy resonates deeply when working with miter cut rails, where accuracy and technique can make or break the outcome.
Crafting perfect miter cut rails involves a blend of skill, the right tools, and a keen eye for detail. Whether you are constructing elegant frames, intricate cabinets, or stylish furniture, the clarity of your angles and the quality of your cuts pave the way for successful joinery. This guide delves into essential tips and techniques to refine your approach to miter cut rails, ensuring that your next woodworking project reflects both your craftsmanship and your passion for the craft. Through mastering these skills, you will not only enhance your woodworking capabilities but also create stunning pieces that will stand the test of time.
Understanding Miter Cuts: Definition and Importance in Woodworking
Miter cuts are an essential technique in woodworking, particularly for achieving seamless joints in projects like frames, cabinets, and trim installations. A miter cut is made at an angle, typically 45 degrees, allowing two pieces to fit together neatly, creating a clean and professional finish. According to a report by the Woodworking Industry Association, nearly 70% of woodworking projects require some form of miter cut, highlighting its importance in achieving structural integrity and aesthetic appeal.
When making miter cuts, precision is paramount. An accurate miter saw setup can significantly enhance the quality of your joints and prevent costly mistakes. Many woodworkers emphasize that even a slight miscalculation can lead to noticeable gaps or misalignments in the finished product. To ensure precision, it is advisable to double-check measurements and use high-quality tools. Additionally, consider employing a stop block when cutting multiple pieces to maintain consistent lengths and angles.
Tips: Always use a fine-toothed blade for cleaner cuts, and make sure to support your workpieces adequately to avoid vibration, which can lead to inaccuracies. Another helpful tip is to practice on scrap wood before executing the final cuts; this will help you familiarize yourself with your tools and refine your technique. By prioritizing accuracy in your miter cuts, you can elevate the quality of your woodworking projects and achieve professional results.
Essential Tools for Creating Perfect Miter Cuts in Wood Projects
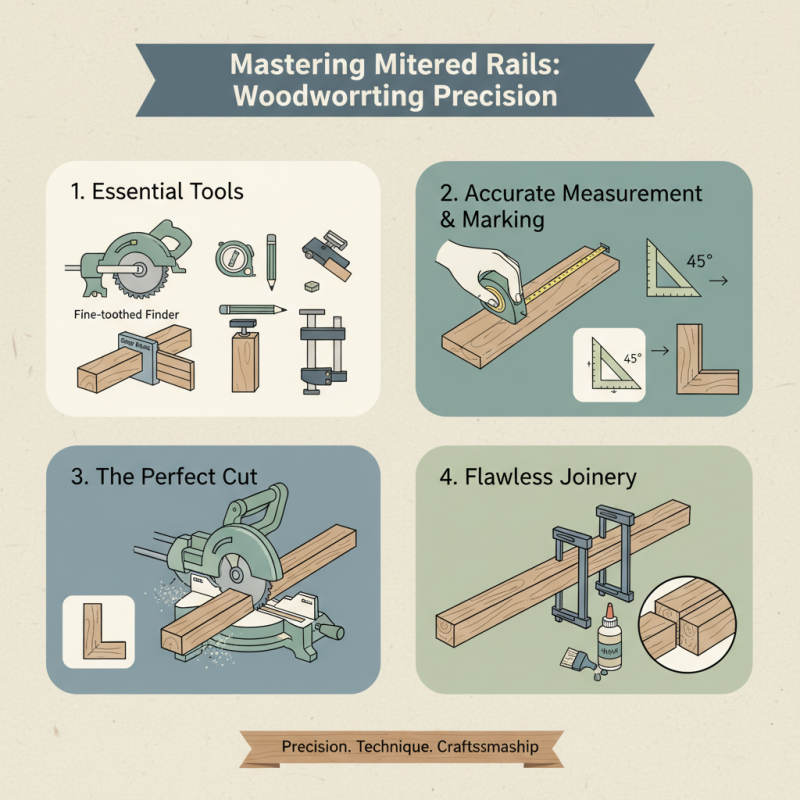
Achieving perfect miter cuts is essential for any woodworking project, as they set the stage for clean joints and seamless edges. To create flawless miter cuts, certain tools are indispensable. A reliable miter saw stands out as the primary tool for making accurate cuts at various angles, typically between 0 and 45 degrees. According to the Woodworking Industry Association, 65% of professional woodworkers consider a high-quality miter saw crucial for precision work, impacting overall project quality.
Alongside a miter saw, the use of a digital angle finder can significantly enhance accuracy. This tool helps ensure that angle settings are exact, minimizing the guesswork involved. Research by the National Association of Home Builders indicates that most errors in woodworking stem from inaccurate measurements, with nearly 30% of seasoned woodworkers citing this as a common issue. Moreover, incorporating clamps can stabilize the workpiece, reducing movement during cutting, which is vital for achieving clean, precise miter cuts. Combining these essential tools ensures that your woodworking projects not only meet professional standards but also elevate your craftsmanship.
Measuring and Marking Techniques for Accurate Miter Cuts
When undertaking a woodworking project that requires miter cuts, precise measuring and marking are crucial for achieving perfect joints. Start by gathering your tools: a reliable measuring tape, a square, a chalk line, and a fine-tipped pencil. Measure the length of your rails accurately, ensuring to account for the angles where the cuts will be made. For a 45-degree miter, it’s essential to mark the cut length on each end of the rail. A good practice is to measure from the end of the board and make a clear mark using your pencil. This method minimizes any errors that might arise from measuring from the same point multiple times.
Once you've marked the cut lengths, use a square to draw straight lines connecting your marks. This not only serves as a guide for your saw but also helps visualize the finished cut. If you’re using a compound miter saw, the setup will need to reflect these measurements. To ensure your cuts are flawless, double-check your angles using both the square and any applicable measuring tools before you make any cuts. A small oversight in marking can lead to mismatched joints, so patience and attention to detail during this phase will pay off in the final assembly.
Setting Up Your Miter Saw for Optimal Performance and Precision
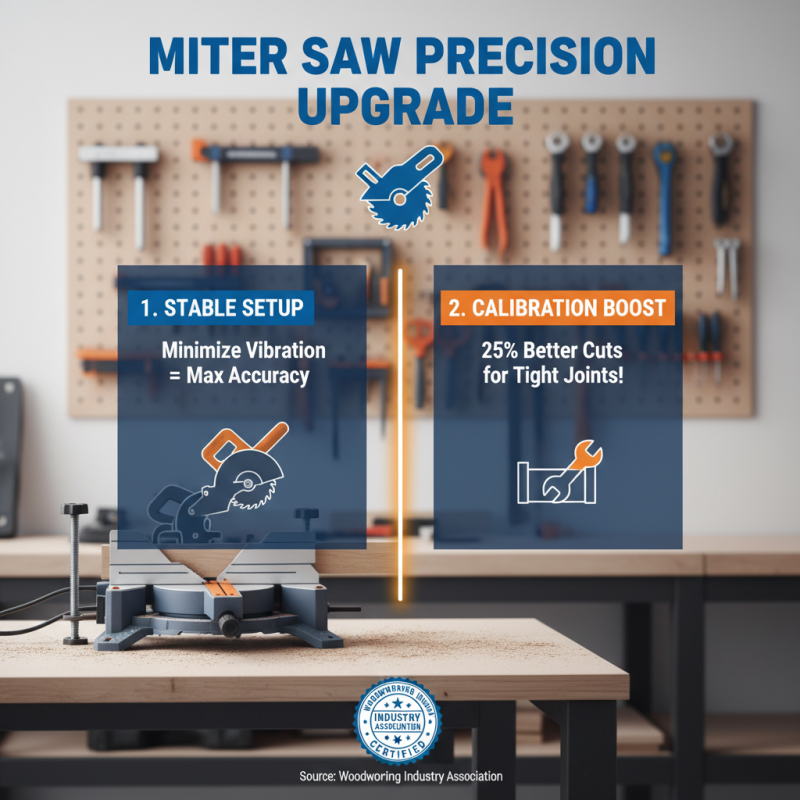
Setting up your miter saw correctly is crucial for achieving precision in woodworking projects, especially when making miter cuts for rails. To enhance your saw's performance, begin by ensuring that the saw is placed on a stable, vibration-free surface. This minimizes movement and increases accuracy. According to the Woodworking Industry Association, properly calibrating your miter saw can improve cutting accuracy by up to 25%, which is vital when working with tight tolerances in joinery.
Next, consider the blade type and condition. A sharp, high-quality blade specifically designed for miter cuts is essential for clean edges and optimal performance. Research shows that saw blades lose their effectiveness after about 50 cuts in hardwoods, so regular maintenance and timely replacement are crucial. Additionally, adjust the bevel and miter angles carefully before starting your project, as even a slight miscalculation can lead to poorly fitting joints. Using digital angle finders or protractors can help ensure precision in your measurements, aligning perfectly with the demand for accuracy in professional woodworking standards.
Common Mistakes to Avoid When Making Miter Cuts in Woodworking
When crafting perfect miter cuts for your woodworking projects, avoiding common mistakes is crucial to achieving professional results. One major pitfall involves miscalculating the angles. According to the Woodworkers Guild of America, even a slight deviation from the desired 45-degree angle can lead to unsightly gaps and misalignment, jeopardizing the integrity of the final assembly. Using a precision miter saw and verifying the angle with a reliable protractor can help you sidestep this issue.
Another frequent error is failing to account for the thickness of the material. A report from the Fine Woodworking magazine highlights that amateur woodworkers often ignore the material's width when marking cut lines, resulting in inconsistent lengths and compromised joints. To ensure perfect fits, measure twice and mark with a fine pencil, indicating where to cut.
**Tip:** Always perform test cuts on scrap wood to verify your settings before making cuts on your actual workpieces. This practice will not only save time but also reduce the risk of wasting valuable materials.
Lastly, remember that proper clamping techniques are essential. An improperly secured workpiece can shift during cutting, leading to dangerous kickbacks and inaccurate cuts. The Woodworkers Association notes that using clamps designed for miter cuts helps maintain the position of your wood securely, ensuring a clean and precise cut every time.
**Tip:** Consider applying a sacrificial fence on your miter saw. It protects the blade from wear and enhances the accuracy of your cuts, minimizing tear-out and splintering.
Common Mistakes in Miter Cuts for Woodworking